
Teleoperation Project: UR3e Robotic Arm & Meta Quest 2
First semester. First country. First project. Robotics & XR. Let's dive in.

General Project Concept
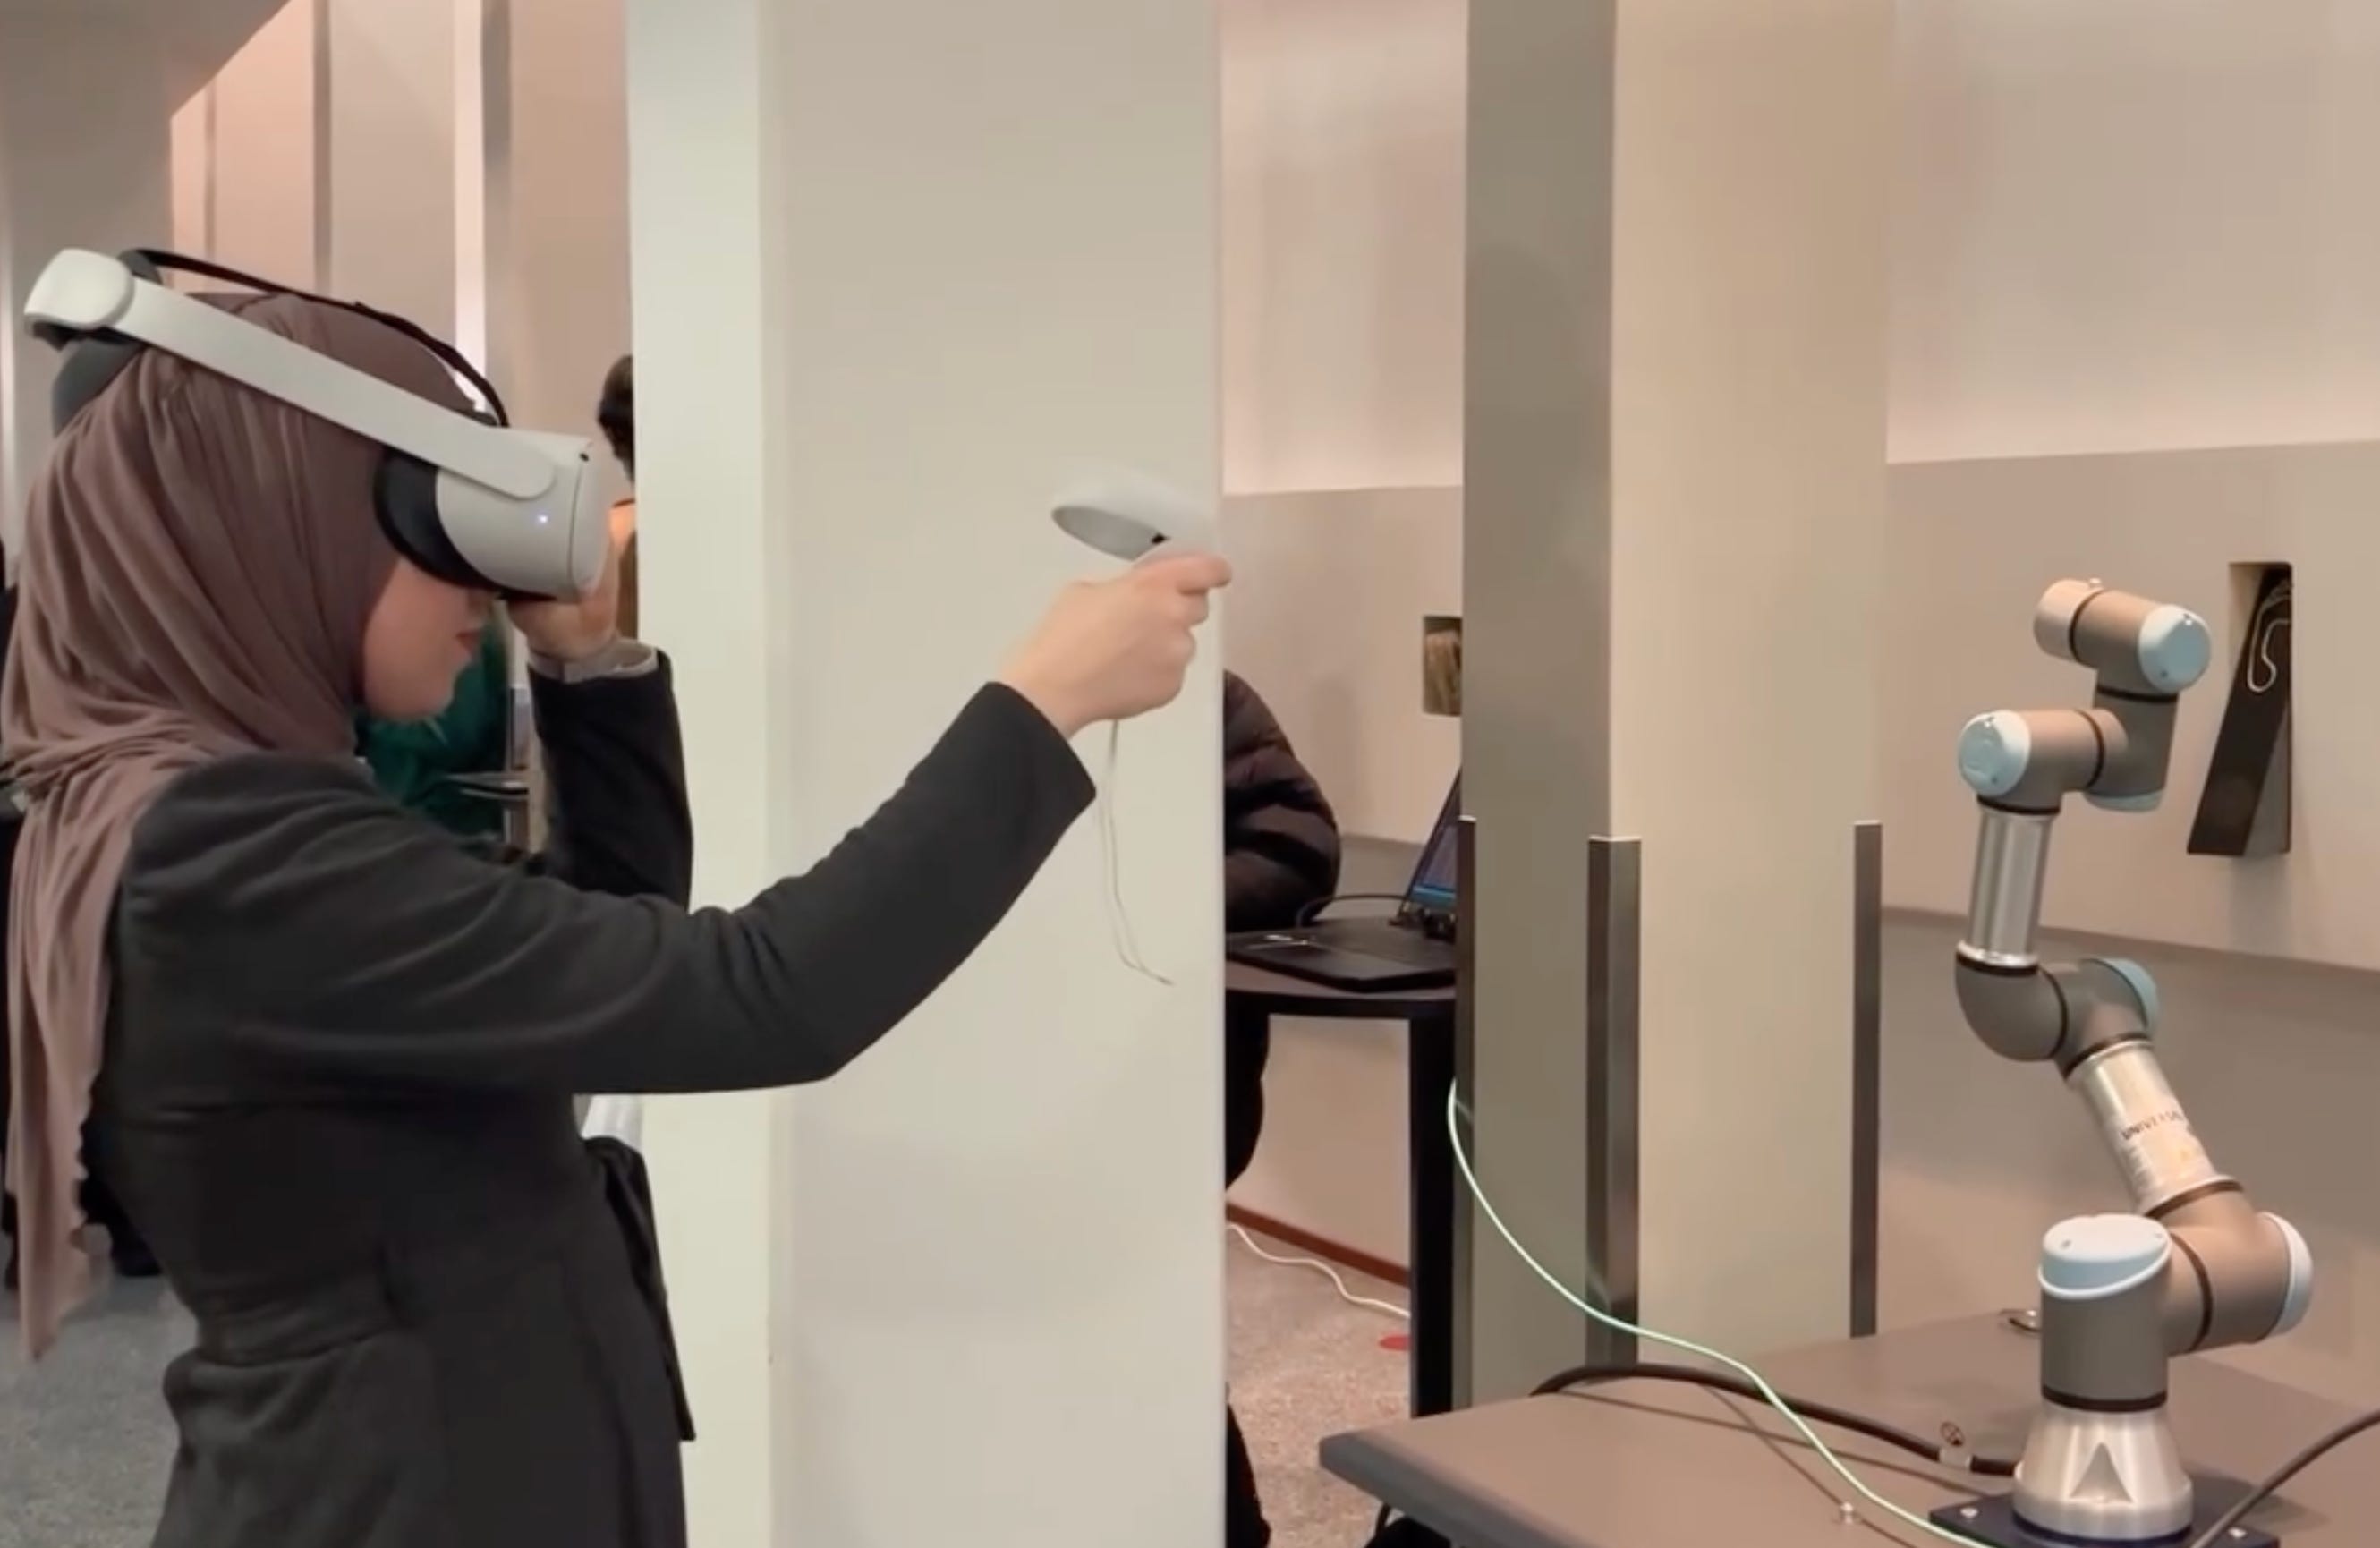
First of all, what is teleoperation and how did my team and I come up with the idea for the project? As per the name of the course “Robotics & XR”, project requirement was to create something at the intersection of those two fields. Having access to all the uni equipment and us being enthusiastic XR students, we did not want to miss this shot at playing around with VR headset and creating something with it. The moment we saw the robotic arm it clicked - we can do teleoperation! In simpler terms, our goal was to create a system where robotic arm is controlled via a VR headset and a controller. Such remote control of the robot’s action is formally named as teleoperation. Additionally, we planned to mount a ZED Mini stereoscopic camera on the VR headset to capture a real-time video feed of the robot’s environment which would then be fed into the VR headset for the user to see how the arm is moving.
Utilizing teleoperation in real-world applications is quite impactful when you think about it. For example, in the field of healthcare, this technology could enable doctors to conduct surgeries in places where there are not many specialists. On the other hand, in places like factories and dangerous sites, robots controlled by people from a safe spot could handle tricky tasks. Our project with 1-month execution time is only a small showcase of the enormous potential of teleoperation.
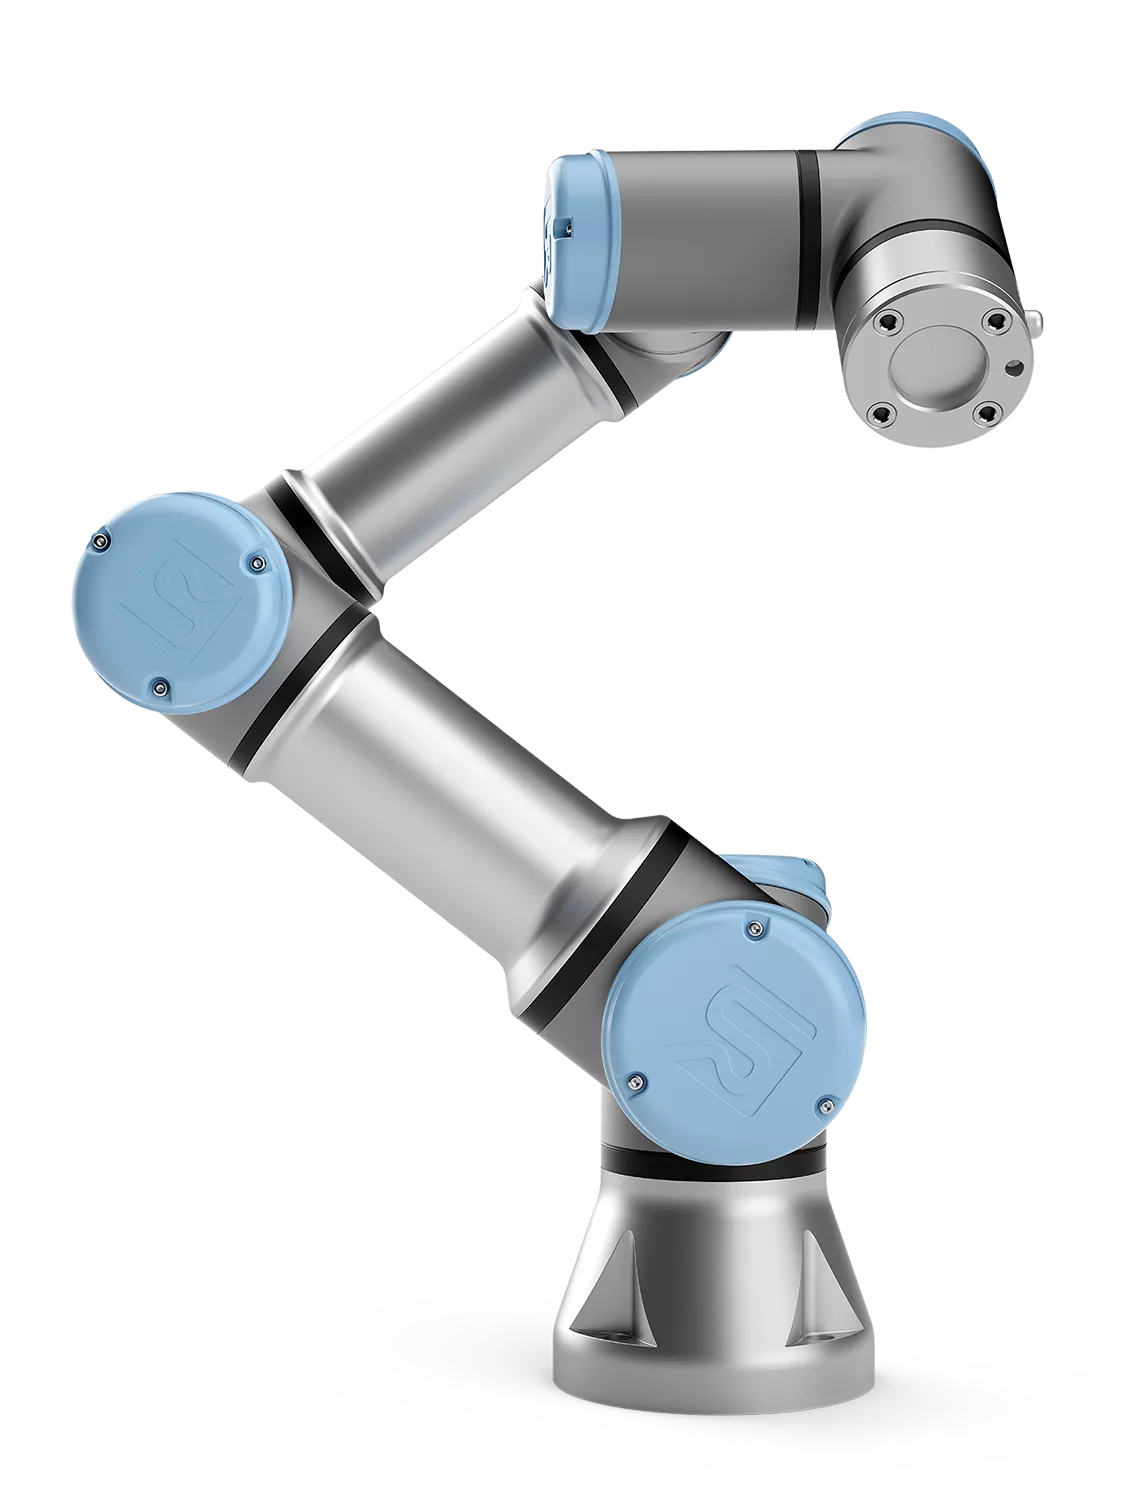
Get to know UR3e Robotic Arm
UR3e is a 6-degree-of-freedom robotic manipulator, meaning it has 5 joints that can rotate 360 degrees, as well as a 6th joint that can rotate freely both ways. It has been manufactured by the Universal Robots Company.
Now, in order to move the robot from one position to another, we need something called inverse kinematics (IK). Basically, we want the robot to move to a certain position and if we know the coordinates of the desired position, with inverse kinematics calculations we get the angles that the robot joints should rotate to reach that position. If you do not want to do all the math from scratch, rest assured there are plenty of libraries that will do the IK calculations for you. In our case, we were lucky to have a math person on our team to explore everything from the ground up.
Important thing to know about robot arm is how to communicate with it. For that purpose, there is a special software developed named Polyscope. It allows developers to program the robot to perform tasks that are needed, and it has been used by us to implement our desired robot movements.
Virtual Reality Setup
VR environment consisted of Meta Quest 2 as the virtual reality headset and Unity as the development environment. I have written about both before, so if you are curious about the headset characteristics, check out → Discover the Most Popular XR Devices for VR, AR and MR, and if you need help setting up Unity for free, head to → AR & VR Software Development Engines: Guide to install Unity.
To setup the project, first step was to create a new project in Unity and set it up for XR. 3D project creation is intuitive via Unity Hub and for the XR component, it is necessary to import the ‘XR Plugin Management’ and ‘XR Interaction Toolkit’ packages, followed by creating an XR origin containing a camera and the hands that will track the headset and the controller. Meta provides .fbx files of the controllers, so we were able to import the 3D model of the right-hand controller to our scene and found a 3D model of the robotic arm, so our initial scene setup looked like below.

How to Build Unity Project to Meta Quest 2?
Now, this can be helpful to you as well for any project in VR.
Firstly, make sure the headset is connected via USB-c cable to your device and in Unity environment, find File -> Build Settings, add your scene by ticking it in the top section and go to Android section. Important note, make sure to have Android build module installed beforehand. In the Android section, change the Texture compression to ASTC and set the headset as the device to run the build project on. If you go to Player settings, additional options can be modified depending on your requirements. Once everything is setup, your window should be similar to the following:
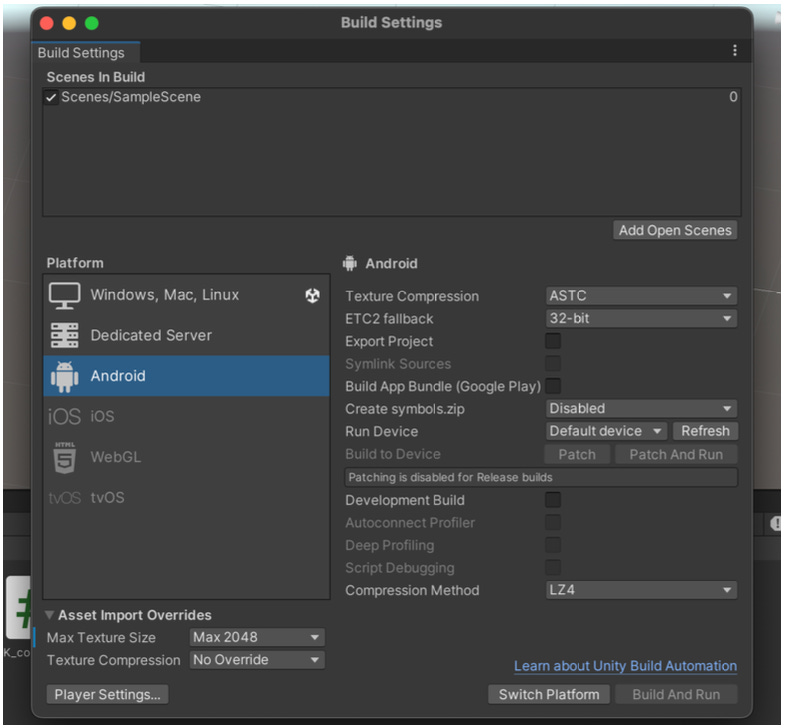
Now click to Switch Platform and Build and Run the project, after which you should be able to see your scene in the Meta Quest 2 headset.
Unity - Robotic Arm Communication
Moving on with the project, we implemented the inverse kinematics for our simulated robot arm in Unity, but now the problem was how to send the calculated joint angle values from Unity as a command to Polyscope, the robotic arm software, for the physical robotic arm to move when the VR controller moves.
To accomplish that, we implemented a simple intermediary Python API using Flask with only one endpoint - HTTP POST request that accepts the angle values in the body of the request from Unity and stores them in a local .txt file.
from flask import Flask, request
import threading


app = Flask(__name__)


@app.route('/move', methods=['POST'])
def move_robot_arm():
    data = request.get_json()
    if data and 'angles' in data:
        angles = data['angles']
        with open("log.txt") as f:
            lines = f.readlines()
            lines[0] = angles
        with open("log.txt", "w") as f:
            f.writelines(lines)

    return 'Success', 200


def flask_thread():
    app.run(host='0.0.0.0', port=5000)


def main():
    thread = threading.Thread(target=flask_thread)
    thread.start()


if __name__ == '__main__':
    main()
On the other hand, another Python script utilizing urx library commands, a well-known Python library developed for controlling the robots from Universal Robots, was initialised with connection to our UR3e arm and implemented to constantly check the .txt file for angle values and use movej urx command to relay the values to the physical robotic arm, i.e., Polyscope, which in turn moved the arm joints.
ZED Mini Camera Integration
Stereolab’s ZED mini stereo camera was intended to be used to generate a live 3D map of the robot’s environment, providing depth and spatial awareness for the user wearing the headset. Unity has a plugin that can integrate ZED camera. We were able to implement the live 3D environment generation in a separate Unity project, however, due to various constraints we were not able to integrate it completely with the rest of the project. Therefore, here is the potential for improvement in case a project like this is interesting to you.
Final Thoughts
No amount of theoretical studying beats project work and knowledge gained through actual application of the learned material. Projects like these are highly valuable for skills development, so make sure to be bold when choosing your project topics - you might be clueless on how to implement it at first, but you will be proud of what you manage to accomplish and learn along the way at the end.
Until next time dear reader,
Keep dreaming.
Jenn | XR Tech Lady